Mary Berry Tiramisu Cake Recipe
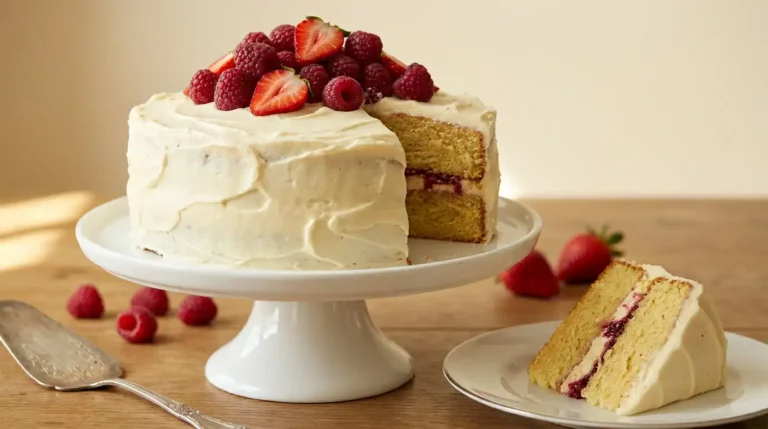
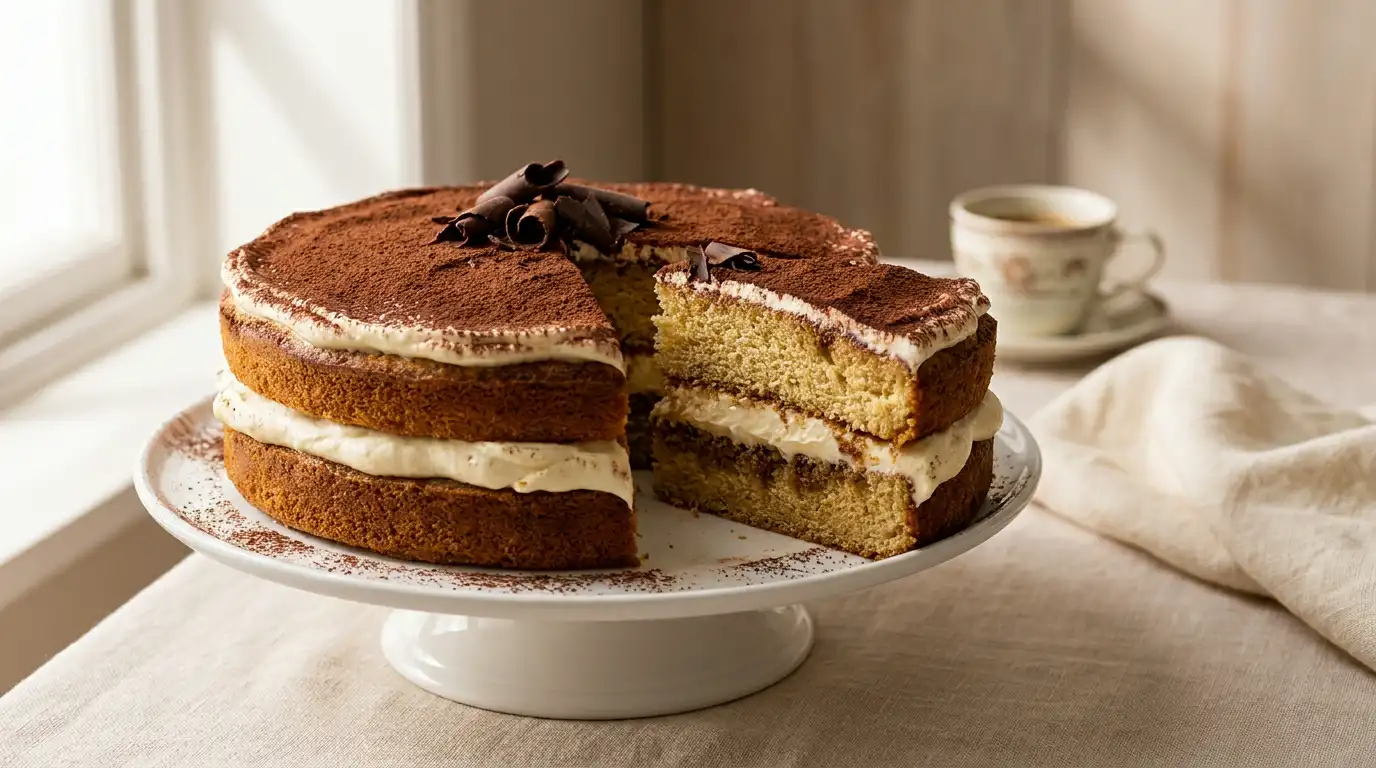
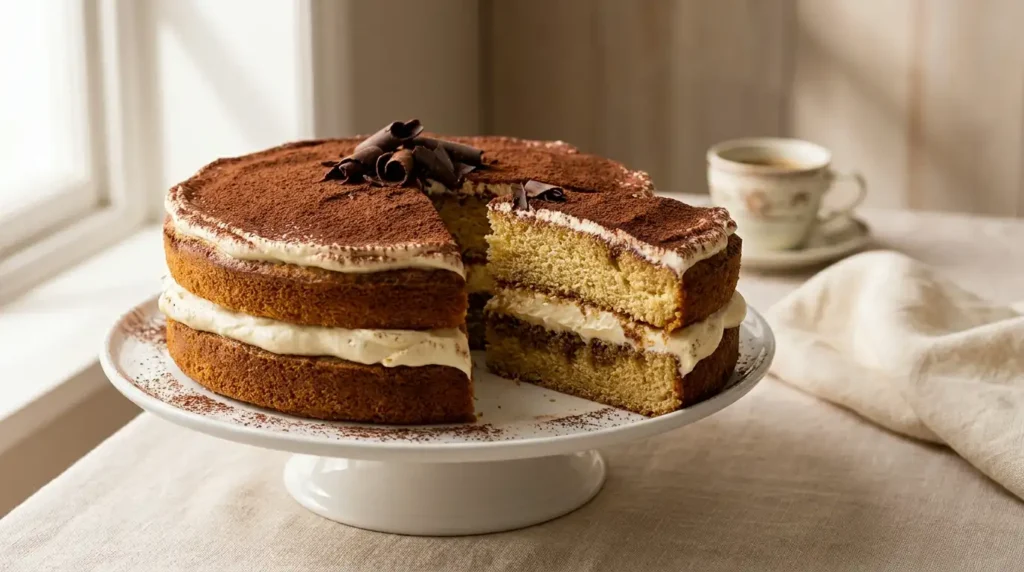
This Mary Berry tiramisu cake is a lightly soaked espresso sponge layered with a cloud-like mascarpone cream, dusted generously with fine cocoa powder that settles into every fold. The layers hold their shape when sliced, revealing clean bands of golden sponge and ivory cream, with the faintest bitterness from the coffee cutting through the richness of the filling.
What makes this version reliable is its straightforward approach. There is no fussy assembly, no raw eggs in the cream, and no specialist equipment beyond a standard round tin. It suits a weekend tea table, a dinner party centrepiece, or a celebration cake that does not require too many components. From start to finish, it is ready in around 2 hours, including cooling time.
Ingredients
- 175g unsalted butter, softened
- 175g caster sugar
- 3 large eggs, at room temperature
- 175g self-raising flour, sifted
- 1 tsp baking powder
- 2 tbsp whole milk
- 1 tsp vanilla extract
- 150ml freshly brewed espresso or very strong coffee, cooled
- 2 tbsp coffee liqueur such as Kahlúa, optional
- 1 tbsp caster sugar
- 250g mascarpone, chilled
- 200ml double cream, chilled
- 3 tbsp icing sugar, sifted
- 1 tsp vanilla extract
- 2 tbsp good-quality cocoa powder, for dusting
- A small handful of dark chocolate shavings, optional
How to Make Mary Berry Tiramisu Cake
Prepare the tin and oven
Heat the oven to 180°C, fan 160°C, Gas 4. Grease two 20cm sandwich tins and line the bases with baking parchment. Buttering the sides lightly helps the sponge release cleanly without tearing the edges.
Cream the butter and sugar
Beat the softened butter and caster sugar together in a large bowl using a hand-held electric mixer on medium-high speed for 4 to 5 minutes until the mixture is very pale, noticeably light, and fluffy. This extended beating incorporates enough air to give the sponge its open, tender crumb.
Add the eggs gradually
Add the eggs one at a time, beating well after each addition. If the mixture begins to look slightly curdled, add a tablespoon of the sifted flour with the next egg. Fold in the vanilla extract.
Fold in the flour
Sift the remaining flour and baking powder over the bowl and fold in gently using a large metal spoon, cutting through the mixture in a figure-of-eight motion. Add the milk and fold again until the batter just falls off the spoon with a slow, reluctant drop. Over-mixing at this stage will tighten the gluten and result in a denser bake.
Bake the sponge layers
Divide the batter equally between the two prepared tins, smoothing the tops level with a palette knife. Bake on the middle shelf for 22 to 25 minutes, or until the sponges are golden-brown, have pulled away slightly from the sides of the tins, and a skewer inserted into the centre comes out clean.
Cool and prepare the coffee soak
Leave the sponges in their tins for 5 minutes, then turn out onto a wire rack and peel off the parchment. Allow to cool completely, about 45 minutes to 1 hour. While the sponges cool, stir the espresso, caster sugar, and liqueur (if using) together until the sugar dissolves. Set aside.
Make the mascarpone cream
Beat the chilled mascarpone, double cream, icing sugar, and vanilla extract together in a large bowl using the electric mixer, starting on low speed and increasing to medium. Stop as soon as the mixture holds soft, billowy peaks. It should look glossy and hold its shape when a spoon is lifted. Do not over-whip or the cream will become grainy and stiff.
Soak and assemble the cake
Place the first sponge layer on a serving plate. Using a pastry brush or a spoon, drizzle half the coffee soak evenly over the surface, allowing it to absorb for a minute or two. Spread or pipe half the mascarpone cream over the soaked layer, taking it almost to the edges. Place the second sponge on top, soak again with the remaining coffee liquid, then spread the rest of the cream over the top.
Dust with cocoa and serve
Sift the cocoa powder through a fine-mesh sieve held about 15cm above the cake, using slow, sweeping movements to achieve an even, velvety layer. Add dark chocolate shavings if desired. Refrigerate for at least 30 minutes before slicing so the cream sets and the layers firm up for clean, neat cuts.
Tips for the Best Mary Berry Tiramisu Cake
01 Why does the mascarpone cream turn grainy or watery after mixing?
02 Why did the sponge layers come out dense rather than light?
03 How do I stop the sponge from becoming soggy when I add the coffee soak?
04 Why is the cocoa powder blotchy on top rather than even?
05 Why does the cream slide off the cake when sliced?
Serving Suggestions
Serve chilled straight from the refrigerator so the mascarpone cream holds its shape and slices neatly at the table.
Pair with a small cup of strong black espresso or an Americano, which echoes the coffee notes already in the sponge.
Plate individual slices with a light dusting of extra cocoa powder and a few thin shards of dark chocolate arranged across the cream.
Offer alongside a small jug of single cream for guests who prefer a less rich finish with their slice.
Finish with a light scatter of finely grated orange zest over the cocoa for a subtle citrus lift that brightens the coffee flavour.
Storage
Room Temperature
Because of the mascarpone cream filling, the assembled cake should not be kept at room temperature for more than 1 hour before serving.
Refrigerator
Store the assembled cake, loosely covered with cling film or in a lidded cake container, in the refrigerator for up to 3 days. Remove from the fridge 10 to 15 minutes before slicing so the cream softens slightly and the texture returns to its best.
Freezing
Freeze the plain sponge layers only (without cream or coffee soak) by wrapping each one tightly in cling film, then a layer of foil, and keep for up to 1 month. Defrost overnight in the refrigerator, then bring to room temperature before soaking and assembling with freshly made mascarpone cream.
Nutrition
FAQs
01 Can I make this Mary Berry tiramisu cake a day ahead?
02 Can I use cream cheese instead of mascarpone in the filling?
03 What size tin works best for this tiramisu cake recipe?
04 Can I make this recipe without alcohol?
05 Can I double this tiramisu cake recipe for a larger crowd?
Conclusion
This Mary Berry tiramisu cake brings together a tender vanilla sponge, a well-balanced coffee soak, and a lightly sweetened mascarpone cream in a format that is far simpler to assemble than a traditional tiramisu. It yields 8 to 10 generous slices, making it ideal for a family gathering or a relaxed dinner party. The cocoa dusting on top sets it apart visually, and the flavours deepen overnight in the refrigerator, so making it ahead is genuinely worthwhile.
Whether this is a first attempt at a layered cake or a familiar bake revisited, the method is straightforward and the results are consistent. Give it a go this weekend, and leave a comment below to let us know how it turned out. If you found this recipe useful, please share it with a friend who would enjoy it too. If you enjoyed this, you might also like the Mary Berry Chicken Ham and Leek Pie Recipe for a satisfying savoury bake to serve alongside.
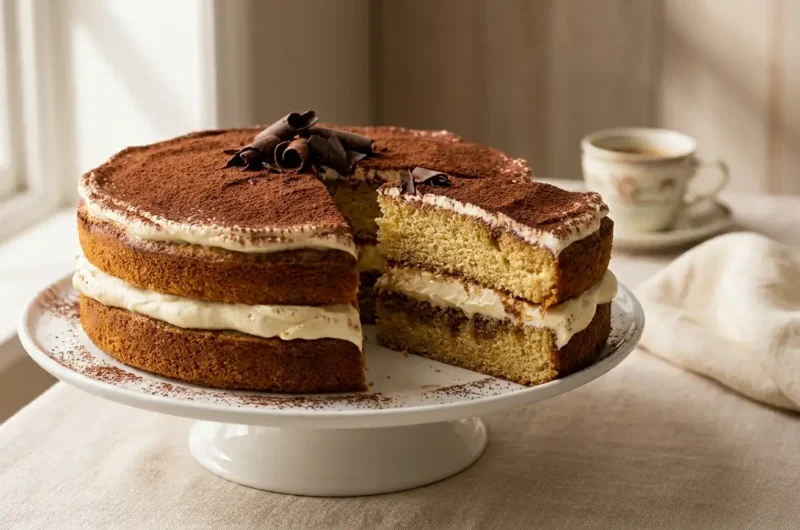
Mary Berry Tiramisu Cake Recipe
Course: DessertCuisine: BritishDifficulty: Easy10
servings30
minutes25
minutes480
kcal2
hoursA lightly soaked espresso sponge layered with a cloud-like mascarpone cream and dusted with fine cocoa powder. This beginner-friendly tiramisu cake holds its shape when sliced and is ready in around 2 hours from start to finish.
Ingredients
175g unsalted butter, softened
175g caster sugar
3 large eggs, at room temperature
175g self-raising flour, sifted
1 tsp baking powder
2 tbsp whole milk
1 tsp vanilla extract
150ml freshly brewed espresso or very strong coffee, cooled
2 tbsp coffee liqueur such as Kahlua, optional
1 tbsp caster sugar
250g mascarpone, chilled
200ml double cream, chilled
3 tbsp icing sugar, sifted
1 tsp vanilla extract
2 tbsp good-quality cocoa powder, for dusting
a small handful of dark chocolate shavings, optional
Instructions
- Heat the oven to 180C, fan 160C, Gas 4. Grease two 20cm sandwich tins and line the bases with baking parchment.
- Beat the softened butter and caster sugar together in a large bowl using a hand-held electric mixer on medium-high speed for 4 to 5 minutes until the mixture is very pale, light, and fluffy.
- Add the eggs one at a time, beating well after each addition. If the mixture begins to look slightly curdled, add a tablespoon of the sifted flour with the next egg. Fold in the vanilla extract.
- Sift the remaining flour and baking powder over the bowl and fold in gently using a large metal spoon. Add the milk and fold again until the batter just falls off the spoon with a slow, reluctant drop.
- Divide the batter equally between the two prepared tins and smooth the tops level. Bake on the middle shelf for 22 to 25 minutes, or until golden-brown and a skewer inserted into the centre comes out clean.
- Leave the sponges in their tins for 5 minutes, then turn out onto a wire rack and allow to cool completely, about 45 minutes to 1 hour. Stir the espresso, caster sugar, and liqueur together until the sugar dissolves and set aside.
- Beat the chilled mascarpone, double cream, icing sugar, and vanilla extract together using the electric mixer, starting on low speed and increasing to medium, until the mixture holds soft, billowy peaks.
- Place the first sponge layer on a serving plate and drizzle half the coffee soak evenly over the surface. Spread half the mascarpone cream over the soaked layer. Place the second sponge on top, soak again, then spread the rest of the cream over the top.
- Sift the cocoa powder through a fine-mesh sieve held about 15cm above the cake using slow, sweeping movements to achieve an even, velvety layer. Add dark chocolate shavings if desired. Refrigerate for at least 30 minutes before slicing.
Notes
- Make sure butter is fully softened before creaming to achieve a light, airy sponge.
- Add eggs gradually to prevent the batter from curdling.
- Fold flour gently with a metal spoon to avoid overworking the gluten.
- Allow sponge layers to cool completely before applying the coffee soak.
- Apply the coffee soak gradually with a pastry brush for even absorption without sogginess.
- Stop whipping the mascarpone cream as soon as it holds soft peaks to prevent graining.
- Refrigerate the assembled cake for at least 30 minutes before slicing for clean, neat cuts.
- Dust cocoa powder just before serving to maintain an even, velvety finish.