Mary Berry No Bake Vanilla Cheesecake Recipe
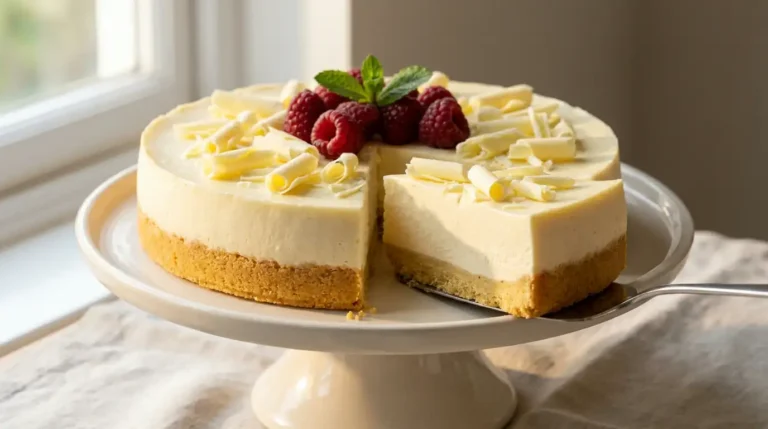
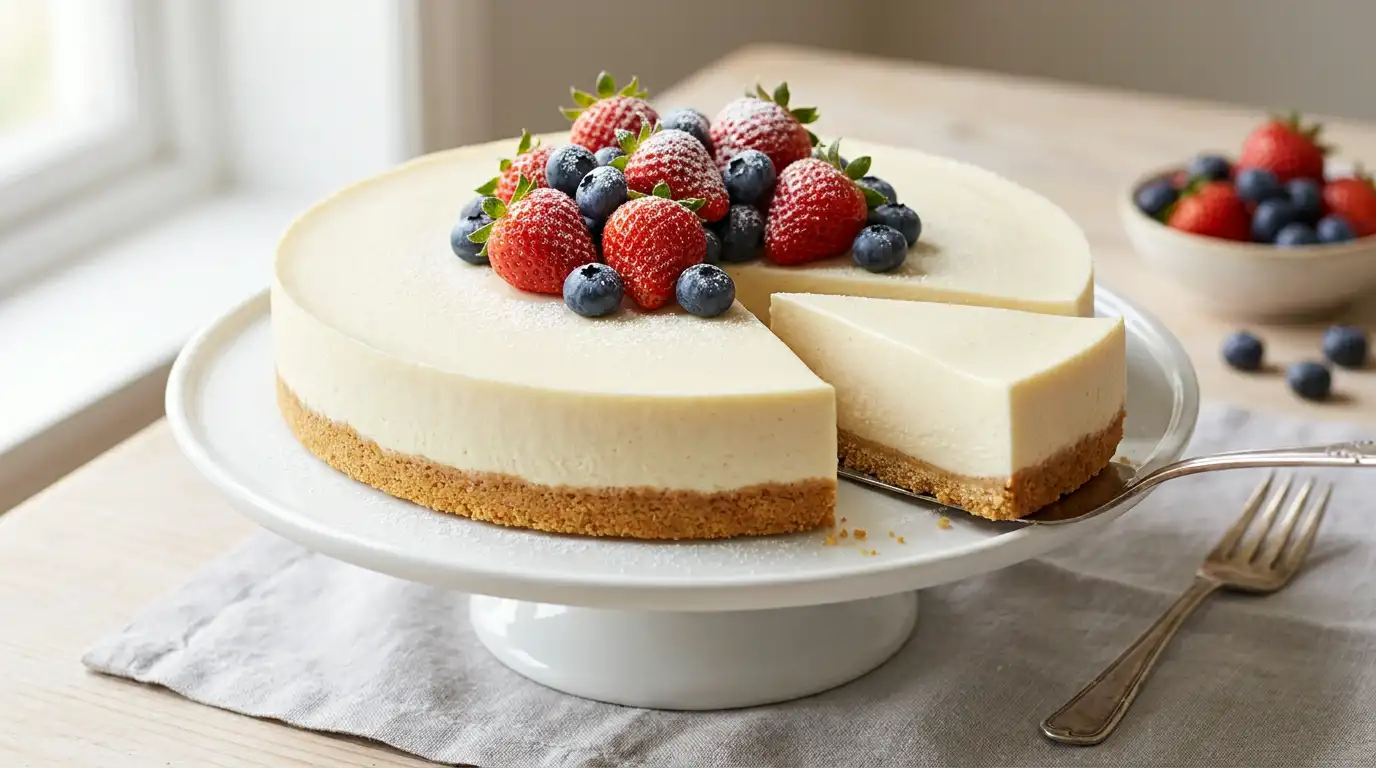
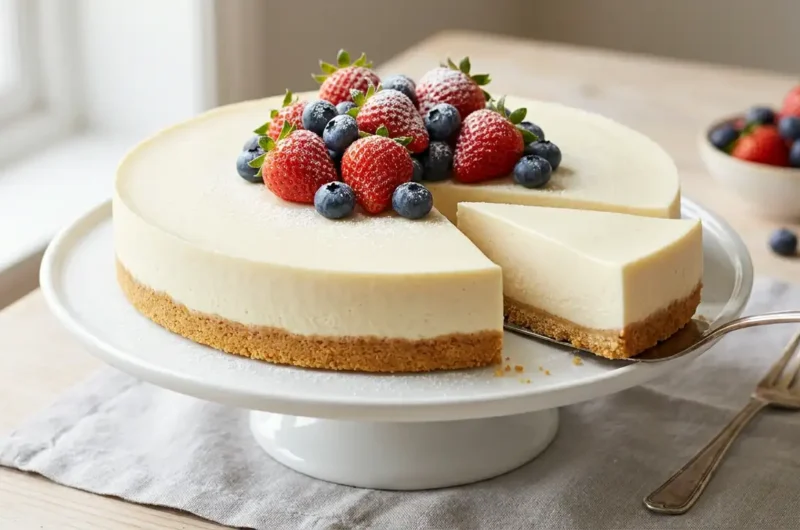
This Mary Berry no bake vanilla cheesecake is a silky, cloud-light dessert with a crisp buttery biscuit base and a cream cheese filling that holds its shape in clean, smooth slices. The vanilla flavour runs gently through the whole thing, warm and fragrant without being overpowering. It is the sort of cheesecake that suits a summer garden party just as well as a quiet weeknight pudding. No oven is needed, which makes it reliably easy to prepare ahead of time. From start to finish, including chilling time, it is ready in around 4 hours and 20 minutes.
What sets this no bake vanilla cheesecake apart is the balance between the dense, crumbly base and the mousse-like filling. The texture stays firm enough to slice cleanly but melts gently on the tongue. It is a forgiving recipe that works well for beginners and experienced home cooks alike.
Ingredients
For the biscuit base
- 200g digestive biscuits, crushed to fine crumbs
- 80g unsalted butter, melted
- 1 tablespoon caster sugar
For the vanilla filling
- 400g full-fat cream cheese, at room temperature
- 150ml double cream, chilled
- 80g icing sugar, sifted
- 1 teaspoon pure vanilla extract
- 1 teaspoon vanilla bean paste (optional, for speckling)
To finish
- Fresh berries such as strawberries or blueberries, for serving
- A light dusting of icing sugar
How to Make Mary Berry No Bake Vanilla Cheesecake
- Crush the biscuits: Place the digestive biscuits in a sealed food bag and bash with a rolling pin until the crumbs are uniformly fine, with no large chunks remaining. Alternatively, pulse in a food processor for about 20 seconds.
- Make the base: Tip the crumbs into a bowl, add the caster sugar, and pour over the melted butter. Stir thoroughly until every crumb is coated and the mixture holds together when pressed, which ensures the base will not crumble when sliced.
- Press and chill the base: Transfer the crumb mixture into a 20cm loose-bottomed round tin and press it down firmly and evenly using the back of a spoon or the base of a glass. Refrigerate for 20 minutes while the filling is prepared.
- Whip the cream: Pour the chilled double cream into a large bowl and whisk to soft peaks. The cream should hold a gentle, drooping shape when the whisk is lifted, not stiff peaks, as overwhipped cream will make the filling grainy.
- Beat the cream cheese: In a separate bowl, beat the cream cheese with the icing sugar and vanilla extract until completely smooth and lump-free. Use a hand mixer on a low speed to avoid incorporating too much air at this stage.
- Combine the filling: Fold the whipped cream into the cream cheese mixture in two additions using a large metal spoon. Use gentle, sweeping folds from the bottom of the bowl upward to keep the volume and achieve a light, airy texture.
- Fill the tin: Spoon the vanilla filling onto the chilled biscuit base and spread it out evenly with the back of a spoon or a small palette knife. Smooth the surface so it is level and flat across the top.
- Chill until set: Cover the tin loosely with cling film and refrigerate for a minimum of 4 hours, or overnight if possible. The filling needs this time to firm up fully so that it slices cleanly without collapsing.
- Unmould and serve: Run a thin palette knife or butter knife around the inner edge of the tin before releasing the base. Lift the cheesecake onto a serving plate and add fresh berries and a fine dusting of icing sugar just before serving.
Tips for the Best No Bake Vanilla Cheesecake
Why is my no bake cheesecake filling not setting properly?
The most common cause is using low-fat cream cheese or cream that was not cold enough before whipping. Full-fat cream cheese contains the fat needed to give the filling structure, and cold double cream whips to a stable consistency that holds the filling firm once chilled.
Why does my biscuit base fall apart when I cut the cheesecake?
The base needs enough butter to bind the crumbs together, so make sure all the crumbs are evenly coated before pressing into the tin. Pressing firmly and evenly, then chilling the base before adding the filling, also helps it hold together once sliced.
How do I get a completely smooth, lump-free filling?
The cream cheese must be at room temperature before beating. Cold cream cheese will not mix smoothly and leaves small lumps throughout the filling even with extended beating. Letting it sit out for 30 to 45 minutes before starting makes a noticeable difference.
Why is my cheesecake filling grainy in texture?
Overwhipped double cream is usually the reason. Once the cream is whipped to soft peaks, stop immediately. If the cream is taken to stiff or separated peaks before folding, the finished filling will have a slightly curdled, granular texture rather than a smooth, silky one.
Why is the top of my cheesecake cracking after chilling?
Covering the tin too tightly with cling film while it chills can cause condensation, which drips onto the surface and causes cracking or a wet patch. Lay the cling film loosely over the top without pressing it against the filling.
Serving Suggestions
- Serve chilled, straight from the fridge, with a handful of fresh strawberries and a small drizzle of strawberry coulis for colour contrast.
- Arrange blueberries and raspberries across the top in clusters for a simple, striking finish that suits a dinner party presentation.
- Pair a slice with a cup of Earl Grey tea for an elegant afternoon serving.
- Add a spoonful of lemon curd alongside the slice for a sharp, citrus note that cuts through the richness of the cream cheese filling.
- Dust the surface lightly with finely grated lemon zest just before serving for a subtle fragrance that lifts the vanilla.
Storage
Room Temperature
Keep the cheesecake out of the fridge for no longer than 2 hours at room temperature, as the cream cheese filling will soften and begin to lose its structure beyond this point.
Refrigerator
Store the cheesecake covered loosely with cling film or in an airtight container in the fridge for up to 3 days. Keep it in the tin until ready to slice, as removing it in advance can dry out the edges.
Freezing
To freeze, wrap the whole cheesecake, still in its tin base, tightly in a double layer of cling film followed by a layer of foil, and freeze for up to 1 month. Defrost overnight in the fridge, then allow 30 minutes at room temperature before slicing, as a very cold cheesecake can crack when cut.
Nutrition
- Calories: 385 kcal
- Carbohydrates: 28g
- Protein: 5g
- Fat: 29g
- Saturated Fat: 17g
- Sodium: 240mg
Nutrition values are estimates only and will vary depending on the specific brands and ingredients used, as well as the size of each serving.
FAQs
Can I use mascarpone instead of cream cheese in this no bake cheesecake?
Mascarpone works as a substitute and gives the filling a richer, slightly sweeter flavour. The texture will be a little denser than with cream cheese, and the filling will also set more firmly when chilled. Use the same quantity as listed for cream cheese.
Can I make this no bake vanilla cheesecake the day before serving?
Yes, and chilling it overnight actually produces a better result. The filling sets more firmly after a full night in the fridge, which makes it easier to unmould and slice cleanly. Add the fruit topping just before serving so it stays fresh.
Can I freeze a no bake cheesecake successfully?
This cheesecake freezes well when wrapped correctly and eaten within 1 month. Thaw it slowly in the fridge rather than at room temperature to prevent the filling from becoming watery on the surface. Avoid freezing once the fruit topping has been added.
What size tin works best for this recipe?
A 20cm loose-bottomed round tin gives the ideal depth for both the base and the filling. A smaller tin will result in a deeper cheesecake that takes longer to set, while a larger tin will produce a thinner slice that may be harder to plate neatly.
Can I use a different type of biscuit for the base?
Digestive biscuits are the most reliable choice as they have a neutral, slightly wheaty flavour that complements the vanilla filling. Hobnobs give a chewier, oat-heavy base, while ginger nut biscuits add a warm, spiced note. Both work well, but reduce the added sugar slightly if using ginger nuts, as they are already quite sweet.
Conclusion
This Mary Berry no bake vanilla cheesecake is one of those reliable, crowd-pleasing desserts that requires very little effort but delivers a polished, professional-looking result. The biscuit base is firm and buttery, the filling is smooth and lightly set, and the vanilla flavour carries throughout every clean slice. This recipe makes approximately 8 generous slices, making it well-suited to dinner parties, family gatherings, or simply having something special in the fridge for the week ahead.
With no oven required and the ability to prepare it fully in advance, this cheesecake takes the pressure out of entertaining. If you give it a try, leave a comment below with how it turned out, or share it with someone who would appreciate a straightforward, no-fuss dessert. If you enjoyed this, you might also like the Mary Berry Mediterranean Chicken Thighs with Chorizo Recipe for a satisfying main course to serve before this dessert.
Mary Berry No Bake Vanilla Cheesecake Recipe
Course: DessertCuisine: BritishDifficulty: Easy8
servings20
minutes385
kcal4
hours20
minutesA silky, cloud-light no bake vanilla cheesecake with a crisp buttery biscuit base and a smooth cream cheese filling. Beginner-friendly, oven-free, and perfect for making ahead.
Ingredients
200g digestive biscuits, crushed to fine crumbs
80g unsalted butter, melted
1 tablespoon caster sugar
400g full-fat cream cheese, at room temperature
150ml double cream, chilled
80g icing sugar, sifted
1 teaspoon pure vanilla extract
1 teaspoon vanilla bean paste (optional, for speckling)
fresh berries such as strawberries or blueberries, for serving
a light dusting of icing sugar
Instructions
- Place the digestive biscuits in a sealed food bag and bash with a rolling pin until the crumbs are uniformly fine with no large chunks remaining, or pulse in a food processor for about 20 seconds.
- Tip the crumbs into a bowl, add the caster sugar, and pour over the melted butter. Stir thoroughly until every crumb is coated and the mixture holds together when pressed.
- Transfer the crumb mixture into a 20cm loose-bottomed round tin and press down firmly and evenly using the back of a spoon or the base of a glass. Refrigerate for 20 minutes.
- Pour the chilled double cream into a large bowl and whisk to soft peaks. The cream should hold a gentle, drooping shape when the whisk is lifted.
- In a separate bowl, beat the cream cheese with the icing sugar and vanilla extract on a low speed until completely smooth and lump-free.
- Fold the whipped cream into the cream cheese mixture in two additions using a large metal spoon with gentle, sweeping folds from the bottom of the bowl upward.
- Spoon the vanilla filling onto the chilled biscuit base and spread evenly with the back of a spoon or a small palette knife, smoothing the surface level.
- Cover the tin loosely with cling film and refrigerate for a minimum of 4 hours, or overnight if possible.
- Run a thin palette knife around the inner edge of the tin before releasing the base, lift onto a serving plate, and add fresh berries and a fine dusting of icing sugar just before serving.
Notes
- Use full-fat cream cheese only as low-fat versions will not set the filling properly.
- Cream cheese must be at room temperature before beating to avoid lumps in the filling.
- Stop whipping the double cream at soft peaks to prevent a grainy texture in the finished filling.
- Press the biscuit base firmly and evenly to prevent it from crumbling when sliced.
- Cover the tin loosely with cling film while chilling to avoid condensation cracking the surface.
- Chilling overnight produces a firmer set and cleaner slices than the minimum 4 hours.
- Add the fruit topping just before serving so it stays fresh and does not bleed into the filling.