Mary Berry Lemon Curd Cake Recipe
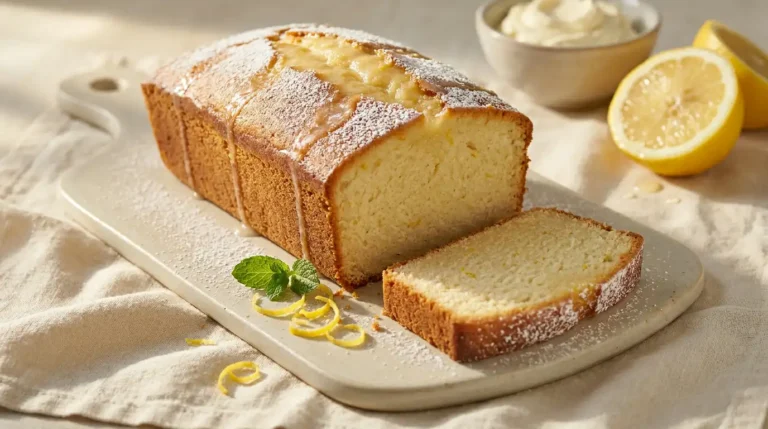
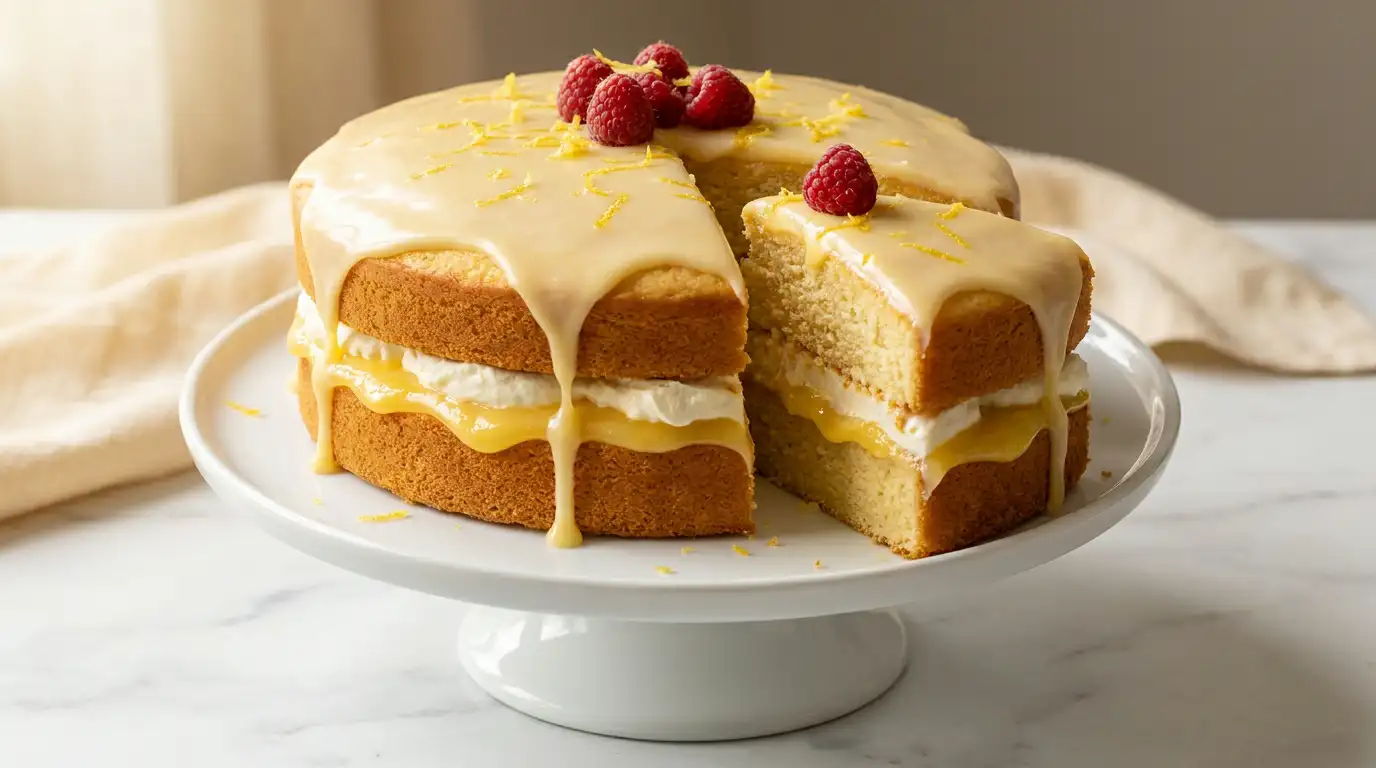
This lemon curd cake is a pale golden sponge with a tender, close crumb, layered with sharp, glossy lemon curd and softly whipped cream that together give a cool, silky contrast to every bite. The top is finished with a thin, semi-translucent lemon glacé icing that sets to a smooth sheen and carries a clean, bright citrus finish.
This mary berry lemon curd cake recipe uses reliable creaming method techniques that give a consistent rise and an even texture, making it equally suited to a celebratory afternoon tea table or a relaxed weekend bake. From start to finish, including cooling time, allow around 1 hour 30 minutes.
Ingredients
For the sponge
- 175g unsalted butter, softened
- 175g caster sugar
- 3 large eggs, lightly beaten
- 175g self-raising flour, sifted
- 1 tsp baking powder
- Zest of 2 unwaxed lemons, finely grated
- 2 tbsp whole milk
For the filling
- 4 tbsp good-quality lemon curd
- 150ml double cream
For the lemon glacé icing
- 150g icing sugar, sifted
- 2 to 3 tbsp fresh lemon juice
To finish
- Zest of 1 unwaxed lemon, finely grated
How to Make Mary Berry Lemon Curd Cake Recipe
- Preheat and prepare the tins: Heat the oven to 180°C (160°C fan, Gas 4). Grease two 20cm round sandwich tins and line the bases with baking parchment. Lining the base prevents the sponge from tearing when you turn it out after baking.
- Cream the butter and sugar: Beat the softened butter and caster sugar together in a large bowl using an electric hand whisk or stand mixer for around 3 to 4 minutes, until the mixture is noticeably pale, light in colour, and fluffy in texture. Thorough creaming at this stage builds the air that gives the sponge its lift.
- Add the eggs gradually: Pour in the lightly beaten eggs a little at a time, mixing well between each addition. If the batter looks like it is beginning to curdle, fold in a tablespoon of the measured flour to stabilise it before continuing.
- Fold in the flour and lemon zest: Add the sifted self-raising flour, baking powder, and finely grated lemon zest to the bowl. Fold everything together gently using a large metal spoon until just combined, then stir through the milk to give a soft, smooth batter that drops easily from the spoon.
- Divide and bake: Weigh the batter and split it equally between the two prepared tins, smoothing the tops level with a palette knife. Bake on the middle shelf for 22 to 25 minutes, until the sponges are evenly golden, spring back when lightly touched in the centre, and have drawn away slightly from the tin edges.
- Cool the sponges: Leave the cakes to rest in the tins for 5 minutes, then carefully turn them out onto a wire rack and peel away the parchment. Allow both layers to cool completely before adding any filling, as a warm sponge will cause the cream to collapse and the curd to pool.
- Whip the cream and build the filling: Whip the double cream to soft, billowing peaks. Place one cooled sponge, flat side up, on a serving plate or cake board. Spread the lemon curd across the surface in an even layer, then spoon the whipped cream on top and spread it gently to the edges.
- Assemble the cake: Place the second sponge on top, flat side down, and press very lightly to bring the two layers together without pushing the filling out. A flat, even top surface makes it much easier to apply the glacé icing neatly.
- Make and apply the glacé icing: Sift the icing sugar into a bowl and add the lemon juice one tablespoon at a time, stirring until the icing is thick enough to coat the back of a spoon but still pourable. Pour it onto the centre of the cake and ease it gently towards the edges with a palette knife, letting it run naturally down the sides in places. Scatter the lemon zest over the top to finish and leave the icing to set for 20 to 30 minutes before slicing.
Tips for the Best Mary Berry Lemon Curd Cake
Why does the lemon flavour taste faint even after adding the zest?
Always use unwaxed lemons and grate the zest finely so the fragrant oils are fully released into the batter. Waxed lemon skins hold the oils back, and coarsely grated zest does not distribute evenly through the mixture during baking.
Why is my glacé icing running straight off the sides instead of setting?
The sponge must be completely cold before any icing is applied. Even a small amount of residual warmth from the cake will thin the icing on contact and prevent it from setting to a smooth, firm finish.
Why did my two sponge layers come out at very different thicknesses?
Weigh the batter carefully and divide it equally between the two tins using digital kitchen scales. Placing both tins on the same central shelf at the same time also ensures they bake at an even rate and finish together.
Why is the whipped cream filling oozing out from between the layers once the cake is assembled?
Cream whipped only to soft peaks holds its shape under the weight of the top sponge without being pushed outward. Over-whipped cream becomes stiff and grainy, and tends to split or bulge at the sides once the layers are pressed together.
Why did the sponge turn out dense rather than light and springy?
Overmixing once the flour is added deflates the air beaten in during the creaming stage and develops the gluten, resulting in a heavy texture. Fold with a metal spoon and stop as soon as no dry streaks of flour remain visible in the batter.
Serving Suggestions
- Serve at room temperature in generous slices alongside a pot of Earl Grey or Darjeeling tea for a classic British afternoon spread.
- Add a small spoonful of extra lemon curd to each plate when serving as a dessert for a sharper, more intense citrus note.
- Arrange a handful of fresh raspberries around each slice for a contrast of deep red colour and a slightly tart, jammy finish that pairs well with the lemon.
- Dust the top lightly with icing sugar as an alternative to the glacé icing for a softer, more rustic presentation at a garden party or picnic.
- Offer a small jug of lightly whipped cream or pouring cream on the side for guests who prefer a richer, more indulgent finish to their slice.
Storage
Room Temperature
Store the assembled cake in an airtight container at room temperature for up to 1 day, as the double cream filling requires refrigeration for longer keeping.
Refrigerator
Keep the cake covered in an airtight container in the fridge for up to 3 days. Remove it from the fridge around 30 minutes before serving so the sponge can return to a soft, tender texture rather than tasting cold and slightly firm.
Freezing
The unfilled, un-iced sponge layers freeze well. Wrap each layer tightly in a double layer of cling film, then in foil, and freeze for up to 2 months. Defrost at room temperature for 2 to 3 hours before filling and icing as normal.
Nutrition
- Calories: 415 kcal
- Carbohydrates: 51g
- Protein: 5g
- Fat: 22g
- Saturated Fat: 13g
- Sodium: 90mg
Nutrition values are estimates only and may vary depending on the specific ingredients used and the size of each serving.
FAQs
Can I use shop-bought lemon curd instead of homemade in this recipe?
Shop-bought lemon curd works well and saves a considerable amount of time. Choose a jar with a high lemon content listed early in the ingredients, as cheaper varieties tend to be overly sweet with very little sharp citrus flavour coming through in the finished cake.
Can I make this lemon curd cake a day in advance?
The sponge layers can be baked the day before and stored wrapped in cling film at room temperature. Fill and ice the cake on the day of serving for the best result, as the cream filling gradually softens the sponge and the glacé icing can become tacky if left overnight in the fridge.
Can I swap the whipped cream in the filling for a lemon buttercream?
A lemon buttercream made with softened unsalted butter, sifted icing sugar, and fresh lemon juice is a very stable alternative that holds up well in warmer conditions and at summer events. It gives a denser, richer mouthfeel compared to the lighter, cooler finish of whipped cream combined with lemon curd.
What size tins work best for this lemon curd sponge cake?
Two 20cm round sandwich tins give the ideal depth and proportion for this quantity of batter. If only deeper 20cm tins are available, reduce the baking time slightly and check the cakes from 20 minutes onwards. Using tins larger than 20cm will produce thin layers that over-bake quickly at the edges.
Can I add poppy seeds to the lemon sponge batter?
Yes, 1 tablespoon of poppy seeds folded into the batter just before dividing between the tins gives a subtle crunch and a classic lemon and poppy seed combination. They do not affect the bake time, the rise, or the overall texture of the sponge.
Conclusion
This mary berry lemon curd cake recipe delivers a tender, fragrant sponge with a sharp and creamy filling, brought together with a bright, set lemon glacé icing that finishes each slice cleanly. The method is straightforward, the results are consistent, and the flavour is fresh and well balanced throughout. This recipe makes 8 to 10 slices depending on how the cake is cut.
Whether baked for an afternoon tea gathering, a birthday, or simply a quiet Sunday bake, this lemon curd cake is a reliable and rewarding choice. If the recipe worked well for you, leave a comment below or share it with someone who would enjoy it. If you enjoyed this, you might also like the mary berry devonshire scones recipe for another classic British bake to add to your repertoire.

Mary Berry Lemon Curd Cake Recipe
Course: DessertCuisine: BritishDifficulty: Easy8
servings30
minutes25
minutes415
kcal1
hour30
minutesA pale golden lemon sponge layered with sharp lemon curd and softly whipped cream, finished with a set lemon glacé icing. This reliable, beginner-friendly bake is well suited to afternoon tea, celebrations, or a relaxed weekend bake.
Ingredients
175g unsalted butter, softened
175g caster sugar
3 large eggs, lightly beaten
175g self-raising flour, sifted
1 tsp baking powder
zest of 2 unwaxed lemons, finely grated
2 tbsp whole milk
4 tbsp good-quality lemon curd
150ml double cream
150g icing sugar, sifted
2 to 3 tbsp fresh lemon juice
zest of 1 unwaxed lemon, finely grated
Instructions
- Heat the oven to 180C (160C fan, Gas 4). Grease two 20cm round sandwich tins and line the bases with baking parchment.
- Beat the softened butter and caster sugar together for 3 to 4 minutes until the mixture is pale, light in colour, and fluffy in texture.
- Add the lightly beaten eggs a little at a time, mixing well between each addition. If the batter begins to curdle, fold in a tablespoon of the measured flour to stabilise it.
- Fold in the sifted self-raising flour, baking powder, and lemon zest using a large metal spoon until just combined, then stir through the milk to give a soft, dropping consistency.
- Divide the batter equally between the two prepared tins and smooth the tops level. Bake on the middle shelf for 22 to 25 minutes until evenly golden and springy when lightly pressed in the centre.
- Leave the cakes in the tins for 5 minutes, then turn out onto a wire rack, peel away the parchment, and allow to cool completely before assembling.
- Whip the double cream to soft, billowing peaks. Place one cooled sponge flat side up on a serving plate, spread the lemon curd evenly across the surface, then spoon the whipped cream on top and spread to the edges.
- Place the second sponge on top flat side down and press gently to bring the two layers together without pushing the filling outward.
- Sift the icing sugar into a bowl and stir in the lemon juice one tablespoon at a time until thick but pourable. Pour onto the centre of the cake, ease gently to the edges, scatter over the lemon zest, and leave to set for 20 to 30 minutes before slicing.
Notes
- Always use unwaxed lemons and grate the zest finely to release the citrus oils fully into the batter.
- The sponge must be completely cold before the glacé icing is applied to prevent it from running and failing to set.
- Weigh the batter and divide it equally between the tins using digital kitchen scales to ensure even layers.
- Whip the cream only to soft peaks so it holds its shape without splitting or pushing outward once the top sponge is placed on.
- Fold the batter with a metal spoon once the flour is added and stop as soon as no dry streaks remain visible.