Mary Berry Chocolate Fairy Cakes Recipe
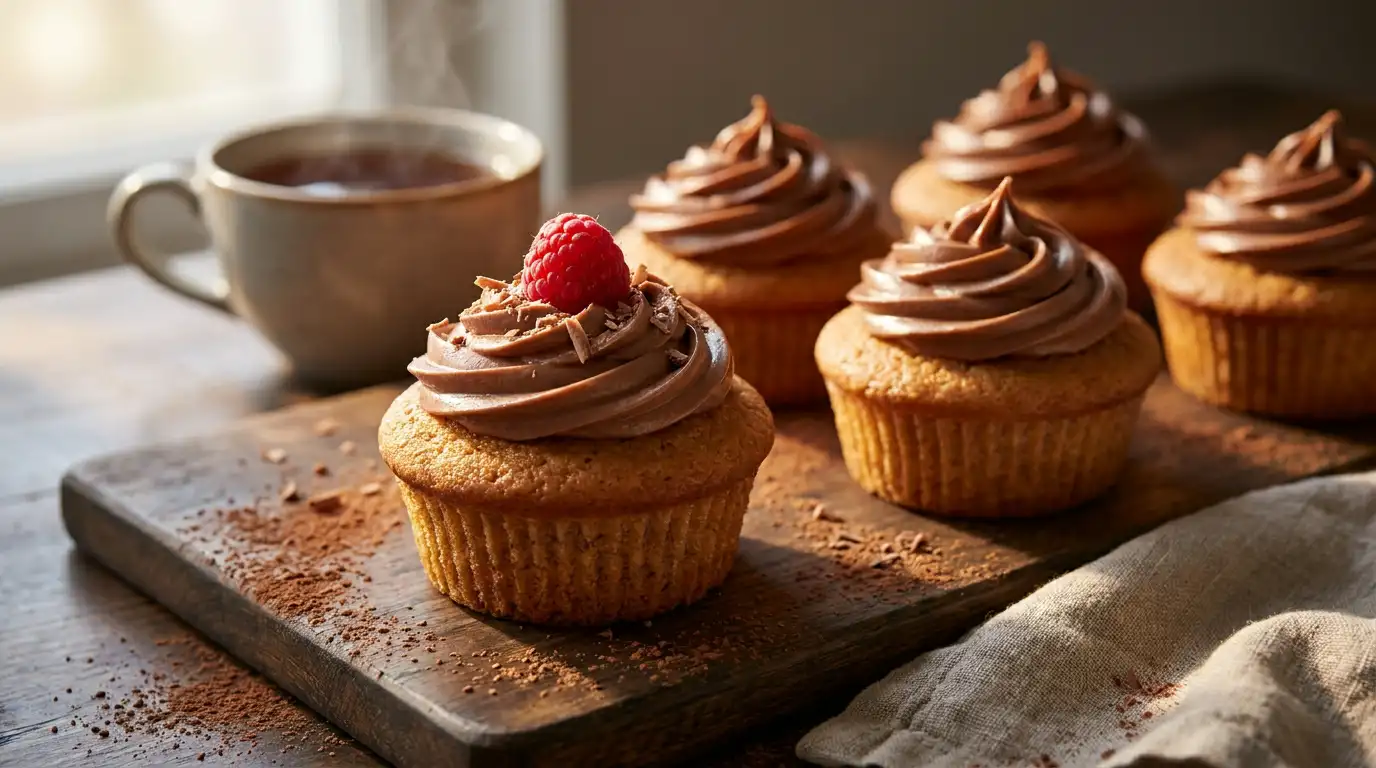
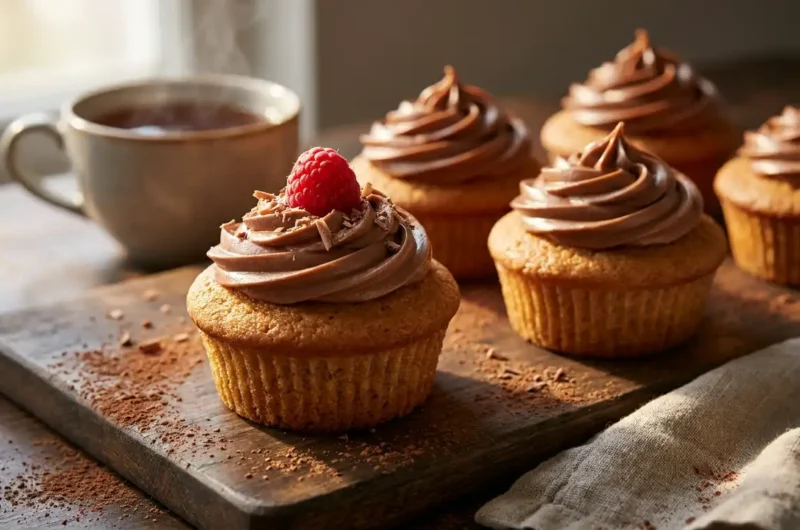
These chocolate fairy cakes are soft, deeply chocolatey sponges with a fine, even crumb and a neat domed top that holds a swirl of buttercream well.
This Mary Berry chocolate fairy cakes recipe uses a simple all-in-one method, so beginners get a reliable rise every time. It suits lunchboxes, school bakes and quick afternoon treats equally well. From start to finish, they are ready in around 40 minutes.
Ingredients
For the sponge
- 100g self-raising flour
- 15g cocoa powder
- 100g caster sugar
- 100g unsalted butter, softened
- 2 medium eggs
- 1 tsp baking powder
- 1 tbsp milk
For the buttercream
- 75g unsalted butter, softened
- 150g icing sugar, sifted
- 15g cocoa powder
- 2 tbsp milk
To finish
- 12 paper cake cases
- 2 tbsp chocolate sprinkles or grated chocolate
How to Make Mary Berry Chocolate Fairy Cakes
- Prepare the tin: Line a 12-hole muffin tin with paper cases and heat the oven to 180C (160C fan).
- Mix the batter: Put the flour, cocoa powder, baking powder, sugar, butter, eggs and milk into a large bowl and beat with an electric whisk until smooth and pale; this all-in-one method keeps the crumb light without overworking the mixture.
- Divide the mixture: Spoon the batter evenly between the paper cases, filling each about two-thirds full so they have room to dome as they rise.
- Bake the cakes: Bake for 15 to 18 minutes until well risen and springy to the touch.
- Cool completely: Transfer the cakes to a wire rack and leave to cool fully before icing, as warm cakes will melt the buttercream.
- Make the buttercream: Beat the butter until soft, then gradually add the icing sugar and cocoa powder, beating well between additions until light and fluffy.
- Loosen the icing: Add the milk a little at a time and beat again until the buttercream is smooth and easy to pipe.
- Decorate the cakes: Pipe or spread the buttercream onto each cooled cake and finish with sprinkles or grated chocolate.
Tips for the Best Mary Berry Chocolate Fairy Cakes
Why did my fairy cakes sink in the middle?
This usually happens when the oven door is opened too early or the cakes are taken out before the centre is fully set. Wait until they are well risen and spring back when lightly pressed before removing them.
Why are my fairy cakes dense instead of light?
Dense cakes are often the result of over-beating the mixture once the flour goes in, which knocks out the air. Mix only until the batter is smooth and no streaks remain.
Why did my cakes rise unevenly?
Uneven rise is often caused by an oven that runs hotter on one side, or by cases filled to different levels. Rotate the tin halfway through baking and fill each case to roughly the same amount.
How do I stop the buttercream from splitting?
Splitting happens when the butter is too cold or the icing sugar is added too quickly. Make sure the butter is properly softened and add the icing sugar gradually, beating well after each addition.
Why does my sponge taste bitter?
A bitter edge usually points to too much cocoa powder or baking powder measured by eye rather than weighed. Always weigh dry ingredients accurately for a balanced, chocolatey flavour.
Serving Suggestions
- Serve at room temperature so the buttercream is soft and easy to bite into
- Pair with a pot of tea for an afternoon treat
- Add a fresh raspberry on top of each cake for a fruity contrast
- Pack into a lunchbox as a simple midweek treat
- Arrange on a tiered stand for a children’s party table
Storage
Room temperature
Store in an airtight container for up to 3 days.
Refrigerator
Keep in an airtight container in the fridge for up to 5 days, as the buttercream helps them stay fresh a little longer. Bring to room temperature before serving for the best texture.
Freezing
Freeze the un-iced sponges wrapped tightly in cling film for up to 2 months. Defrost fully at room temperature before making the buttercream and decorating.
Nutrition
- Calories: 195 kcal
- Carbohydrates: 24g
- Protein: 2g
- Fat: 10g
- Saturated Fat: 6g
- Sodium: 90mg
Nutrition values are estimated and can vary depending on the exact ingredients and portion sizes used.
FAQs
Can I use plain flour instead of self-raising flour?
Yes, use 100g plain flour with 2 tsp baking powder in place of the self-raising flour and baking powder listed.
Can I make these fairy cakes ahead of time?
Yes, bake the sponges a day ahead and store them in an airtight container, then ice them closer to serving for the freshest finish.
Can I freeze chocolate fairy cakes?
Yes, the plain sponges freeze well for up to 2 months, though it is best to add the buttercream after defrosting rather than before.
What size cases work best for fairy cakes?
Standard fairy cake or small cupcake cases work best, as they hold the smaller amount of batter needed for a neat, domed shape.
Can I double this recipe?
Yes, this recipe doubles easily to make 24 fairy cakes, just bake in batches if your tin only holds 12 at a time.
Conclusion
This Mary Berry chocolate fairy cakes recipe brings together a light, chocolatey sponge and a smooth, fluffy buttercream in a bake that beginners can rely on. The all-in-one method keeps things quick, while the small batch size makes it easy to fit into a normal home kitchen.
This recipe makes 12 fairy cakes, ideal for lunchboxes, school events or an afternoon treat with tea. Give them a try, and share your results or leave a comment below with any tweaks you made. If you enjoyed this, you might also like mary berry chocolate traybake recipe.
Mary Berry Chocolate Fairy Cakes Recipe
Course: DessertCuisine: BritishDifficulty: Easy12
servings15
minutes18
minutes195
kcal40
minutesSoft, deeply chocolatey fairy cakes with a light, even crumb, made with a simple all-in-one method and topped with smooth chocolate buttercream.
Ingredients
100g self-raising flour
15g cocoa powder
100g caster sugar
100g unsalted butter, softened
2 medium eggs
1 tsp baking powder
1 tbsp milk
75g unsalted butter, softened
150g icing sugar, sifted
15g cocoa powder
2 tbsp milk
12 paper cake cases
2 tbsp chocolate sprinkles or grated chocolate
Instructions
- Line a 12-hole muffin tin with paper cases and heat the oven to 180C (160C fan).
- Put the flour, cocoa powder, baking powder, sugar, butter, eggs and milk into a large bowl and beat with an electric whisk until smooth and pale.
- Spoon the batter evenly between the paper cases, filling each about two-thirds full.
- Bake for 15 to 18 minutes until well risen and springy to the touch.
- Transfer the cakes to a wire rack and leave to cool fully before icing.
- Beat the butter until soft, then gradually add the icing sugar and cocoa powder, beating well between additions until light and fluffy.
- Add the milk a little at a time and beat again until the buttercream is smooth and easy to pipe.
- Pipe or spread the buttercream onto each cooled cake and finish with sprinkles or grated chocolate.
Notes
- Wait until cakes are well risen and spring back before removing from the oven.
- Mix only until the batter is smooth to avoid a dense crumb.
- Rotate the tin halfway through baking for an even rise.
- Make sure butter is properly softened before adding icing sugar.
- Weigh dry ingredients accurately for balanced flavour.
- Freeze un-iced sponges for up to 2 months and ice after defrosting.