Mary Berry Gluten-Free Chocolate Cake Recipe
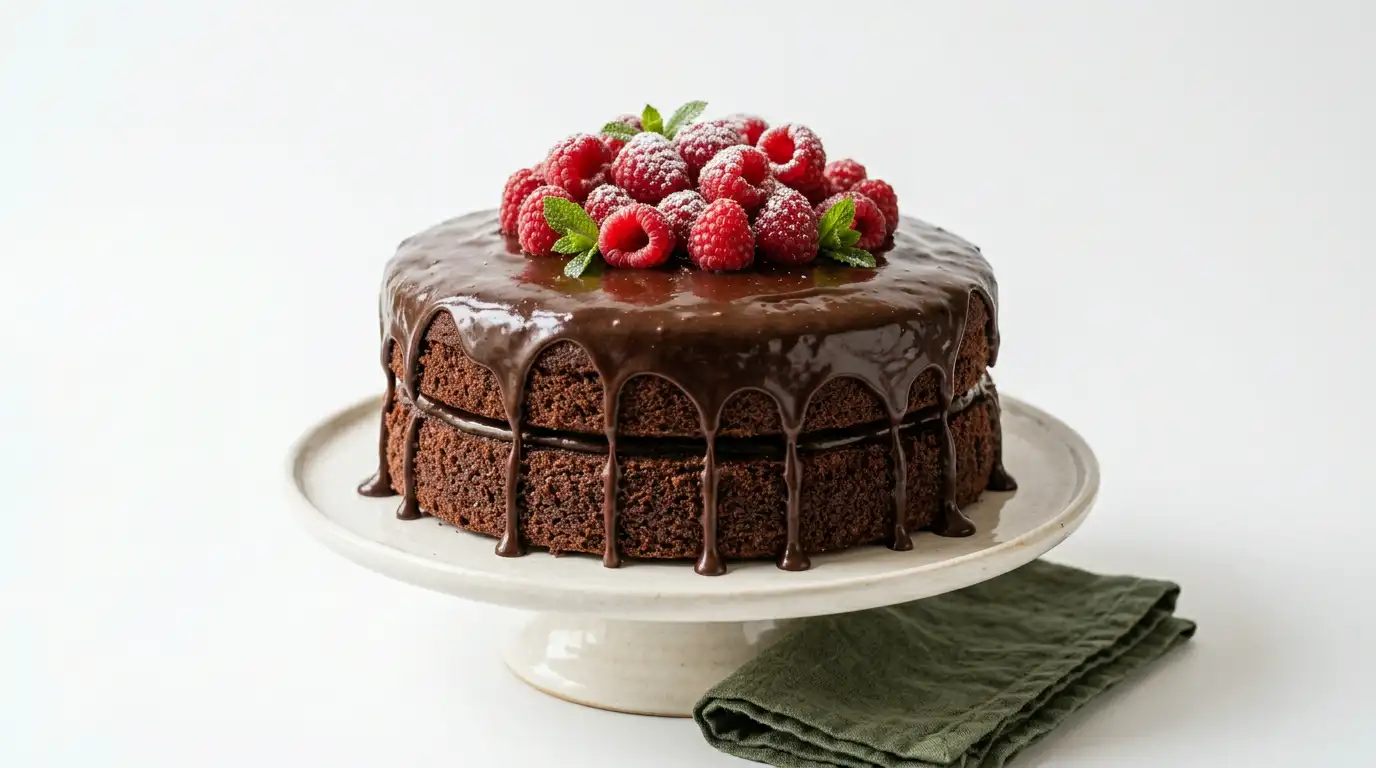
This Mary Berry gluten-free chocolate cake is a deeply moist, tender crumb with a rich, dark cocoa depth and a glossy ganache that sets to a smooth, fudgy finish. The texture is dense enough to feel indulgent but light enough to slice cleanly, with no trace of the graininess that so often plagues gluten-free bakes.
What makes this recipe reliable is its straightforward method, a careful balance of ground almonds and rice flour that gives the sponge real structure without any specialist knowledge. It suits birthdays, afternoon tea, or any occasion where a centrepiece dessert is needed. From start to finish, it is ready in around 1 hour 15 minutes.
Ingredients
- 175g unsalted butter, softened, plus extra for greasing
- 175g caster sugar
- 3 large eggs, at room temperature
- 100g ground almonds
- 75g fine white rice flour
- 2 tsp gluten-free baking powder
- 50g good-quality cocoa powder, sifted
- 2 tbsp whole milk
- 1 tsp vanilla extract
- 150ml double cream
- 150g dark chocolate (70% cocoa solids), finely chopped
- 1 tbsp unsalted butter
- A small handful of fresh raspberries or chocolate shavings, to decorate (optional)
- Icing sugar, lightly dusted (optional)
How to Make Mary Berry Gluten-Free Chocolate Cake
- 01
Prepare the Tins
Preheat the oven to 180°C (160°C fan, Gas Mark 4). Grease two 20cm round sandwich tins and line the bases with non-stick baking paper. Greasing the sides lightly helps the sponge release cleanly once baked.
- 02
Cream the Butter and Sugar
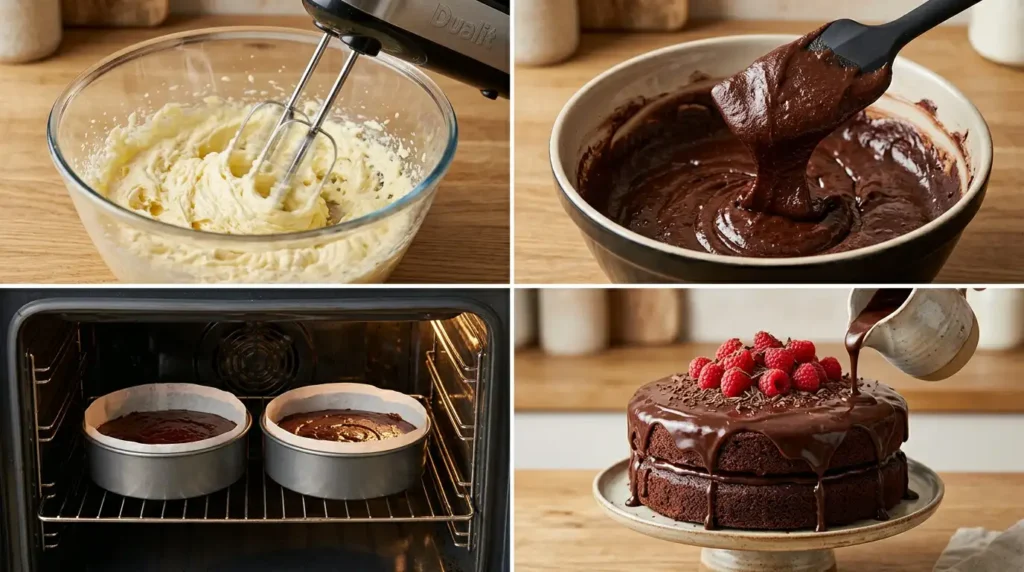
Place the softened butter and caster sugar in a large bowl. Beat together using an electric hand mixer or stand mixer on medium-high speed for 3 to 4 minutes until the mixture is pale, noticeably lighter in colour, and very fluffy. This aeration at the start is what gives the sponge its lift, compensating for the absence of gluten.
- 03
Add the Eggs
Beat in the eggs one at a time, mixing well after each addition. If the mixture begins to look curdled, add a spoonful of the ground almonds and continue mixing. Stir in the vanilla extract with the final egg.
- 04
Fold in the Dry Ingredients
Sift the cocoa powder, rice flour, and gluten-free baking powder directly into the bowl. Add the ground almonds. Using a large metal spoon or spatula, fold everything together with gentle, scooping movements until just combined. Overworking at this stage can make the sponge dense, so stop as soon as no dry streaks remain.
- 05
Loosen and Divide
Add the milk and stir gently to loosen the batter to a soft, dropping consistency. Divide the mixture evenly between the prepared tins and smooth the tops level with a palette knife or the back of a spoon.
- 06
Bake the Sponges
Place both tins on the middle shelf of the oven and bake for 22 to 25 minutes, until the sponges have risen, feel springy to a light touch in the centre, and a thin skewer inserted into the middle comes out with only a few moist crumbs. Avoid opening the oven door before 20 minutes, as the sudden drop in temperature can cause a gluten-free sponge to sink.
- 07
Cool the Sponges
Leave the sponges in their tins for 10 minutes, then turn out carefully onto a wire rack and leave to cool completely before filling. Filling a warm sponge will melt the ganache and cause it to run out from between the layers.
- 08
Make the Ganache
Place the finely chopped dark chocolate in a heatproof bowl. Heat the double cream in a small saucepan over medium heat until it just begins to steam, with small bubbles forming at the edges. Do not allow it to boil. Pour the hot cream over the chocolate, add the butter, and leave to stand for 2 minutes. Stir slowly from the centre outward until a glossy, smooth ganache forms.
- 09
Assemble and Finish
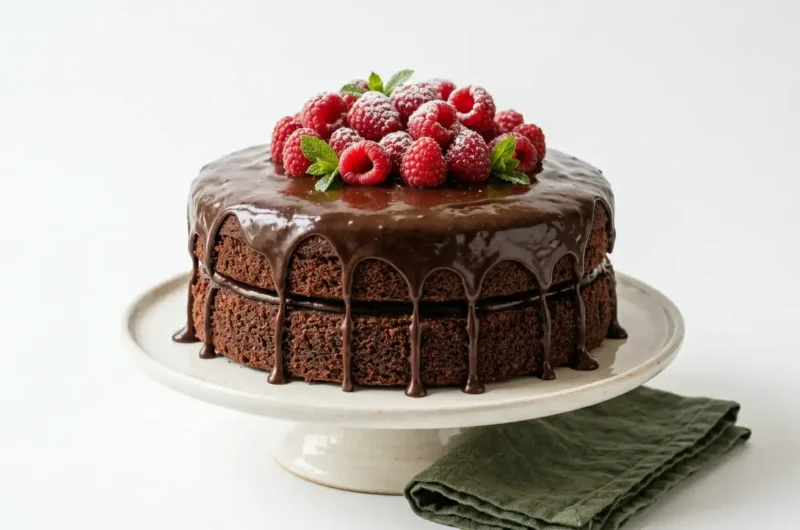
Leave the ganache to cool for 10 to 15 minutes until it reaches a spreadable consistency, similar to thick double cream. Place one cooled sponge on a serving plate or cake board and spread roughly one third of the ganache across the top. Place the second sponge on top and pour the remaining ganache over, spreading it gently across the surface and allowing a little to drip naturally down the sides. Decorate with raspberries or chocolate shavings as preferred, and leave to set for 20 minutes before slicing.
Tips for the Best Mary Berry Gluten-Free Chocolate Cake
01 Why did my gluten-free chocolate sponge sink in the middle?
02 Why is my gluten-free chocolate cake crumbling when I try to slice it?
03 Why does my ganache look split or grainy instead of glossy?
04 How do I stop the top of the cake from doming unevenly?
05 Why does my cake taste slightly gritty or powdery?
Serving Suggestions
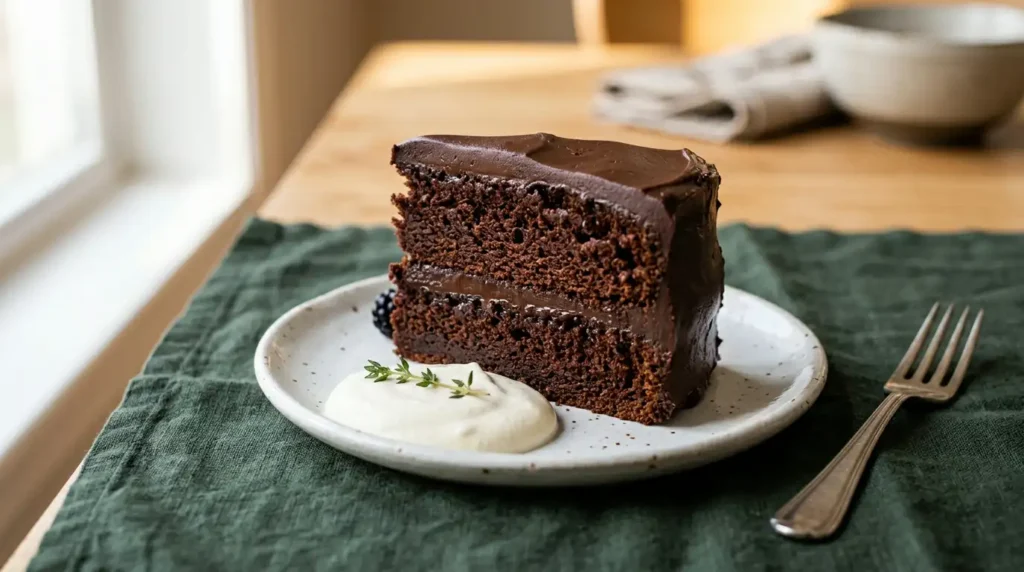
Serve at room temperature with a generous pour of lightly whipped double cream alongside each slice to balance the richness of the dark chocolate ganache.
Pair with a pot of strong Darjeeling or Assam tea for an afternoon tea setting, where the tannins in the tea cut cleanly through the dense, fudgy layers.
Top each slice with two or three fresh raspberries and a small scoop of good vanilla ice cream when serving as a dinner party dessert.
Dust the surface lightly with icing sugar and add a few dried rose petals for a more decorative finish when presenting the cake on a celebration table.
Accompany with a small jug of warm caramel sauce drizzled at the table for an indulgent pudding course that works especially well in cooler months.
Storage
Room Temperature
Store the finished cake in an airtight container at room temperature for up to 3 days, keeping it away from direct sunlight or heat sources that could soften the ganache.
Refrigerator
The cake can be refrigerated in an airtight container or loosely covered with cling film for up to 5 days. Remove it from the fridge at least 30 minutes before serving and allow it to come to room temperature, as cold temperatures firm up the ganache and can make the sponge taste dry.
Freezing
The unfilled sponge layers freeze very well. Wrap each cooled sponge individually in a double layer of cling film, then place inside a freezer bag, and freeze for up to 3 months. Defrost at room temperature for 2 to 3 hours before assembling and topping with freshly made ganache.
Nutrition
Nutrition values are estimates only and may vary depending on the specific brands and ingredients used, portion size, and how the cake is filled and decorated.
FAQs
01 Can I use a different gluten-free flour blend instead of rice flour and ground almonds?
02 Can I make this gluten-free chocolate cake dairy-free as well?
03 Can I make this Mary Berry gluten-free chocolate cake ahead of time?
04 What size tin works best for this gluten-free chocolate cake recipe?
05 Can I use milk chocolate instead of dark chocolate for the ganache?
Conclusion
This Mary Berry gluten-free chocolate cake recipe delivers everything a good celebration cake should: a tender, moist sponge with a deep cocoa flavour, two generous layers sandwiched and finished with a silky dark chocolate ganache. The combination of ground almonds and rice flour gives the crumb real body and a satisfying bite, making this one of those gluten-free bakes that stands on its own merits. This recipe makes 8 to 10 slices, enough for a small gathering or a family birthday.
If this recipe has been useful, feel free to leave a comment below with any questions, or share it with someone who bakes gluten-free. Tried a variation or added your own finishing touch? Share it in the comments. If you enjoyed this recipe, you might also like the Mary Berry Raspberry and White Chocolate Scones Recipe, another reliable bake that works beautifully for afternoon tea.
Mary Berry Gluten-Free Chocolate Cake Recipe
Course: DessertCuisine: BritishDifficulty: Easy10
servings20
minutes25
minutes485
kcal1
hour15
minutesA deeply moist, tender gluten-free chocolate sponge made with ground almonds and rice flour, finished with a rich dark chocolate ganache. Beginner-friendly, reliable, and perfect for birthdays or afternoon tea.
Ingredients
175g unsalted butter, softened, plus extra for greasing
175g caster sugar
3 large eggs, at room temperature
100g ground almonds
75g fine white rice flour
2 tsp gluten-free baking powder
50g good-quality cocoa powder, sifted
2 tbsp whole milk
1 tsp vanilla extract
150ml double cream
150g dark chocolate (70% cocoa solids), finely chopped
1 tbsp unsalted butter
a small handful of fresh raspberries or chocolate shavings to decorate (optional)
icing sugar, lightly dusted (optional)
Instructions
- Preheat the oven to 180°C (160°C fan, Gas Mark 4). Grease two 20cm round sandwich tins and line the bases with non-stick baking paper.
- Place the softened butter and caster sugar in a large bowl and beat on medium-high speed for 3 to 4 minutes until pale, light, and very fluffy.
- Beat in the eggs one at a time, adding a spoonful of ground almonds if the mixture begins to curdle. Stir in the vanilla extract with the final egg.
- Sift the cocoa powder, rice flour, and gluten-free baking powder into the bowl. Add the ground almonds and fold everything together gently until no dry streaks remain.
- Add the milk and stir gently to loosen the batter to a soft, dropping consistency. Divide evenly between the prepared tins and smooth the tops level.
- Bake on the middle shelf for 22 to 25 minutes until risen, springy to the touch, and a skewer inserted in the centre comes out with only a few moist crumbs.
- Leave the sponges in their tins for 10 minutes, then turn out onto a wire rack and cool completely before assembling.
- Place the chopped dark chocolate in a heatproof bowl. Heat the double cream until just steaming, pour over the chocolate with the butter, leave for 2 minutes, then stir slowly from the centre until a glossy ganache forms.
- Allow the ganache to cool for 10 to 15 minutes until spreadable. Spread one third over the first sponge layer, place the second sponge on top, then pour and spread the remaining ganache over the surface. Decorate as preferred and leave to set for 20 minutes before slicing.
Notes
- Use fine white rice flour rather than brown rice flour to avoid a gritty texture.
- Beat the butter and sugar thoroughly at the start as this aeration compensates for the absence of gluten.
- Add a spoonful of ground almonds if the egg mixture shows signs of curdling.
- Do not open the oven before 20 minutes as a sudden temperature drop can cause a gluten-free sponge to sink.
- Cool the sponges fully before applying ganache to prevent it from melting and running out between the layers.
- Stir the ganache slowly from the centre outward to achieve a smooth, glossy finish without incorporating air.