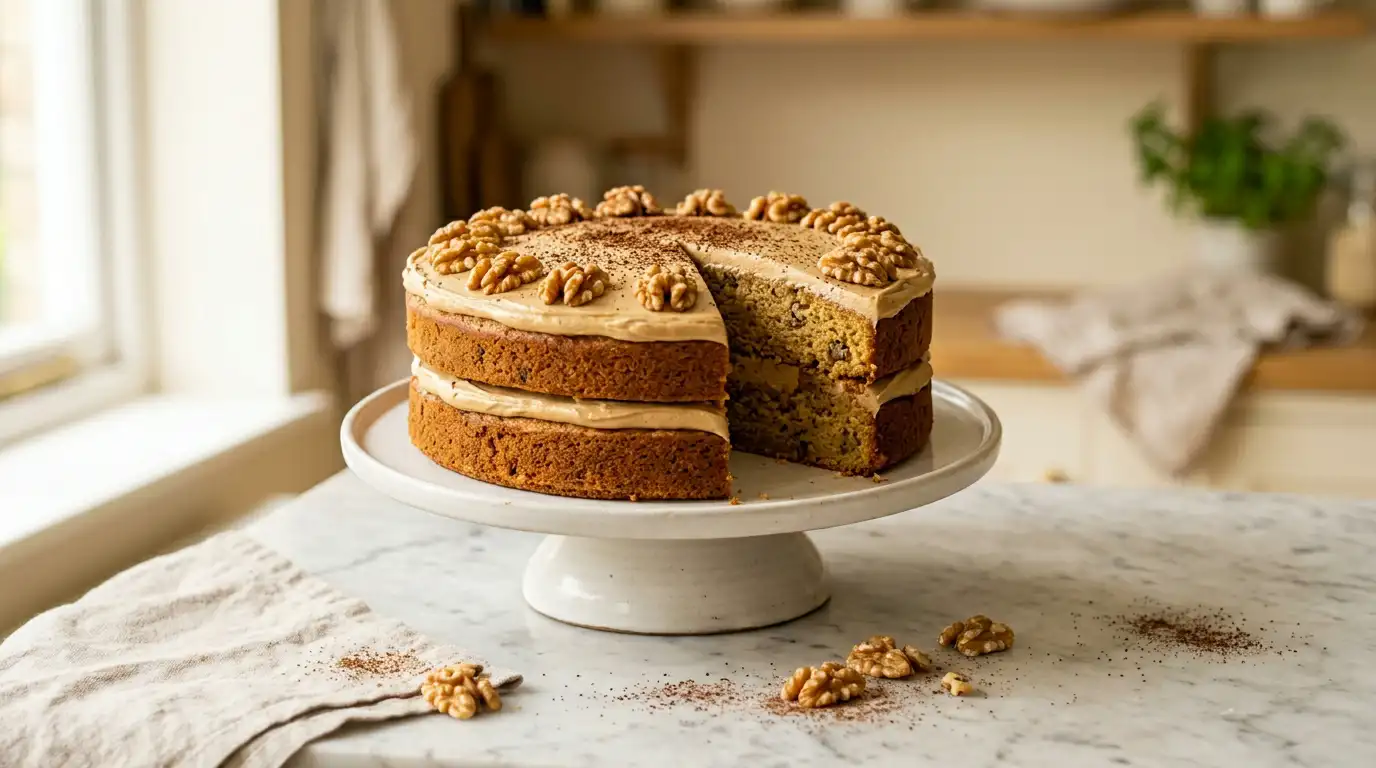
Mary Berry Coffee And Walnut Cake Recipe
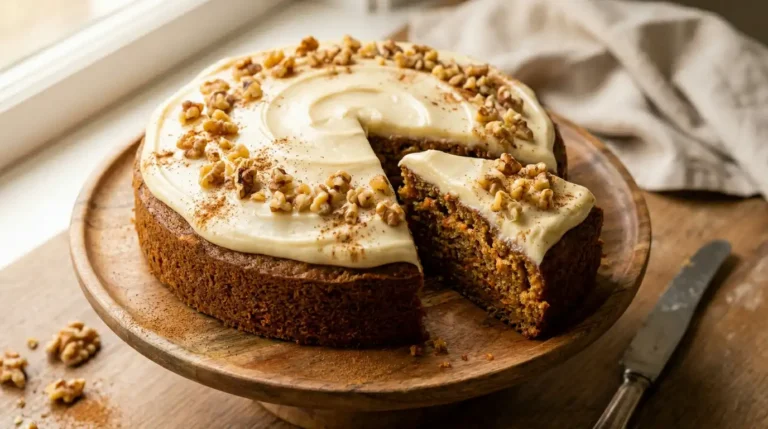
This Mary Berry coffee and walnut cake recipe produces a tender, golden sponge with a deep, roasted coffee note running through every layer, balanced by the faint bitterness of chopped walnuts. The crumb is open and yielding, and the coffee buttercream finishes each slice with a smooth, silky coat that holds its shape cleanly.
It is a reliable bake that works equally well for a weekend afternoon tea or a casual celebration table, delivering consistent results without fuss. The method is clear and beginner-friendly, with each stage building logically on the last. From start to finish, it is ready in around 1 hour 15 minutes.
Ingredients
- 225g unsalted butter, softened
- 225g caster sugar
- 4 large eggs
- 225g self-raising flour, sifted
- 1 tsp baking powder
- 2 tbsp instant coffee granules, dissolved in 2 tbsp boiling water, cooled
- 100g walnuts, roughly chopped
- 175g unsalted butter, softened
- 350g icing sugar, sifted
- 2 tsp instant coffee granules, dissolved in 1 tbsp boiling water, cooled
- 1 to 2 tbsp whole milk, if needed to adjust consistency
- 8 to 10 walnut halves, for decoration
- 1 tsp instant coffee granules, dissolved in 1 tsp boiling water, cooled (optional drizzle)
How to Make Mary Berry Coffee And Walnut Cake
Prepare the tins and oven:
Preheat the oven to 180°C/160°C fan/Gas 4. Grease two 20cm round sandwich tins and line the bases with baking parchment. Positioning both tins side by side on the middle shelf ensures even heat from all sides.
Dissolve the coffee:
Measure the instant coffee granules into a small bowl and pour over the boiling water. Stir until completely dissolved, then leave to cool to room temperature before using, as adding hot liquid to the batter can cause the mixture to curdle unevenly.
Cream the butter and sugar:
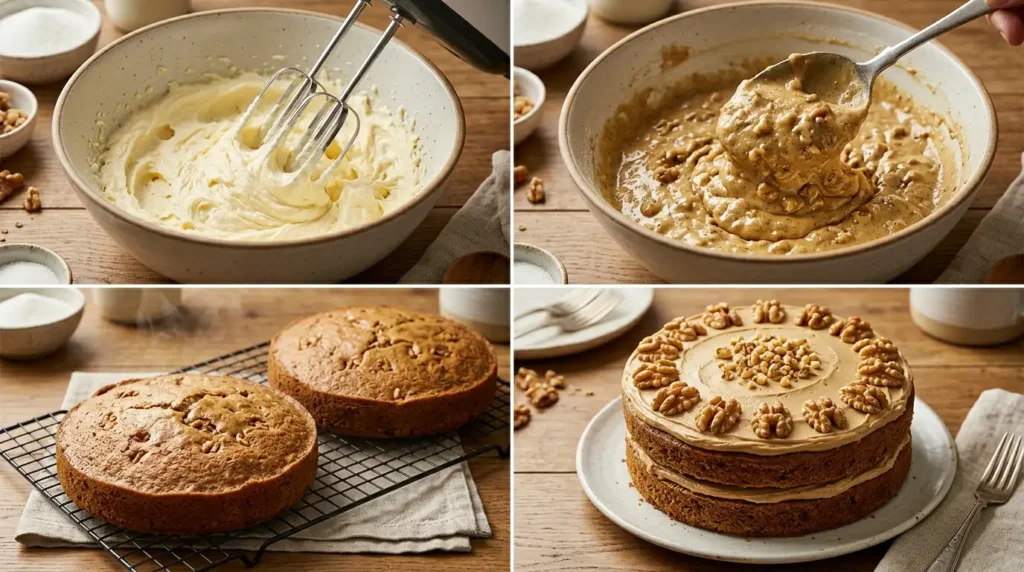
Beat the softened butter and caster sugar in a large bowl using an electric hand whisk for 3 to 4 minutes until the mixture is very pale, noticeably increased in volume, and fluffy throughout. This stage is where the light, open crumb of the sponge is built, so do not rush it.
Add the eggs:
Beat in the eggs one at a time, adding a tablespoon of the sifted flour with each egg to prevent the mixture from splitting. If the batter looks slightly separated at any point, a little extra flour stirred through will bring it back together cleanly before the next egg goes in.
Fold in the flour and flavourings:
Sift the remaining flour and baking powder into the bowl and fold through using a large metal spoon or wide spatula. Once combined, stir in the cooled coffee liquid and the chopped walnuts until evenly distributed. Work gently at this stage, as overmixing after the flour is added tightens the crumb and results in a denser sponge.
Divide and level the batter:
Divide the batter evenly between the two prepared tins. Level each surface with a palette knife or the back of a spoon so both layers bake to an even depth, which makes filling and stacking the cake much easier later.
Bake the sponges:
Place the tins on the middle shelf and bake for 22 to 25 minutes. The sponges are ready when they are golden brown, have pulled away slightly from the edges of the tins, and a skewer inserted into the centre comes out clean with no wet batter attached.
Cool completely:
Leave the sponges in their tins for 5 minutes, then turn out onto a wire rack, peel away the parchment, and leave to cool fully. Applying buttercream to a warm sponge causes it to slide and melt, so allow at least 45 minutes of cooling time before assembling.
Make the coffee buttercream:
Beat the softened butter in a large bowl until smooth and creamy. Add the sifted icing sugar in three or four additions, beating thoroughly between each one. Stir in the cooled dissolved coffee and continue to beat until the buttercream is silky and pale. Add a splash of milk only if the mixture feels stiff and difficult to spread.
Fill, frost, and decorate:
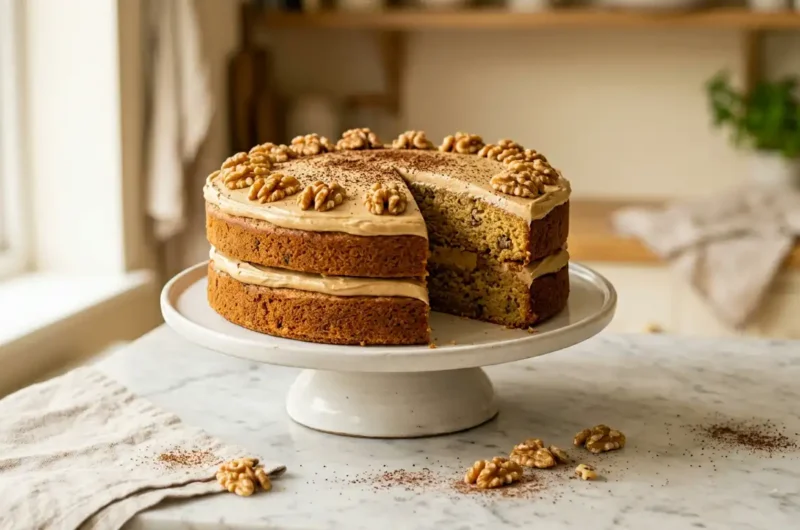
Place one cooled sponge on a flat serving plate and spread roughly half the buttercream across the surface. Set the second sponge on top and spread the remaining buttercream in a smooth, even layer. Arrange the walnut halves in an evenly spaced ring around the top edge, then leave the finished cake to settle for 15 minutes before slicing.
Tips for the Best Mary Berry Coffee And Walnut Cake
01 Why did my coffee and walnut cake sink in the middle?
02 Why is my sponge dense and heavy rather than light and open?
03 Why does the coffee flavour taste weak in the finished cake?
04 How do I stop the buttercream from turning out greasy and separated?
05 How do I get a smooth, even finish on top of the buttercream?
Serving Suggestions
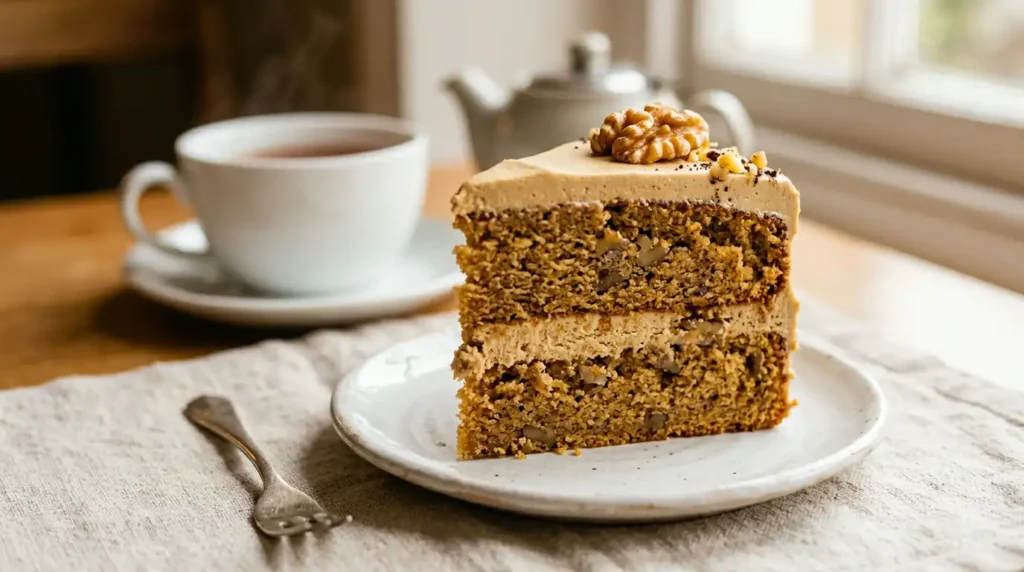
Serve at room temperature alongside a pot of strong Assam or Darjeeling tea for a classic British afternoon spread.
Pair each slice with a small cup of freshly brewed espresso or filter coffee to echo the roasted notes in the sponge.
Dust lightly with a pinch of finely ground coffee powder directly before serving for an extra aromatic, visual finish.
Arrange on a tiered cake stand for a celebration or birthday table, sliced into thinner portions for easy serving.
Spoon a small amount of lightly whipped double cream alongside each slice to cut through the richness of the coffee buttercream.
Storage
Room Temperature
Store the assembled cake in an airtight container at cool room temperature for up to 2 days.
Refrigerator
Keep the cake in an airtight container in the fridge for up to 5 days. Allow it to sit at room temperature for at least 30 to 45 minutes before serving, as chilled buttercream can taste dense and the sponge loses its soft texture straight from the fridge.
Freezing
Wrap individual, unfrosted sponge layers tightly in clingfilm and then in foil before freezing for up to 3 months. Defrost fully at room temperature before filling and frosting, which gives the best crumb texture once assembled.
Nutrition
FAQs
01 Can I use espresso instead of instant coffee granules in this recipe?
02 Can I make this coffee and walnut cake a day ahead?
03 Can I replace the walnuts with a different nut?
04 What size tins work best for this coffee and walnut cake?
05 Can I bake this recipe as a traybake instead of a sandwich cake?
Conclusion
This Mary Berry coffee and walnut cake recipe brings together a tender, flavour-rich sponge and a silky coffee buttercream in a way that is straightforward for beginners and satisfying for more experienced bakers. The recipe yields 10 to 12 generous slices, making it an ideal size for sharing at a gathering or keeping through the week. The balance between the roasted coffee note and the slightly bitter walnut is what gives each slice depth rather than one-note sweetness.
Whether the occasion calls for a celebration cake or a simple weekend bake, this recipe delivers clean, consistent results every time. If it goes down well, leave a comment below to share how it turned out and feel free to pass it on to anyone who enjoys a classic British sponge. If you enjoyed this, you might also like the mary berry lemon drizzle tray bake recipe for another reliable, crowd-pleasing bake.
Mary Berry Coffee And Walnut Cake Recipe
Course: DessertCuisine: BritishDifficulty: Easy12
servings25
minutes25
minutes520
kcal1
hour15
minutesA tender, golden sponge with a deep roasted coffee note balanced by the faint bitterness of chopped walnuts, finished in a smooth and silky coffee buttercream. This beginner-friendly bake is reliable, elegant, and perfect for afternoon tea or casual celebrations.
Ingredients
225g unsalted butter, softened
225g caster sugar
4 large eggs
225g self-raising flour, sifted
1 tsp baking powder
2 tbsp instant coffee granules, dissolved in 2 tbsp boiling water, cooled
100g walnuts, roughly chopped
175g unsalted butter, softened (for buttercream)
350g icing sugar, sifted (for buttercream)
2 tsp instant coffee granules, dissolved in 1 tbsp boiling water, cooled (for buttercream)
1 to 2 tbsp whole milk, if needed (for buttercream)
8 to 10 walnut halves, for decoration
1 tsp instant coffee granules, dissolved in 1 tsp boiling water, cooled (optional drizzle)
Instructions
- Preheat the oven to 180C/160C fan/Gas 4. Grease two 20cm round sandwich tins and line the bases with baking parchment. Place both tins on the middle shelf.
- Dissolve the instant coffee granules in boiling water, stir until fully dissolved, and leave to cool to room temperature before using.
- Beat the softened butter and caster sugar together using an electric hand whisk for 3 to 4 minutes until very pale, fluffy, and noticeably increased in volume.
- Beat in the eggs one at a time, adding a tablespoon of the sifted flour with each egg to prevent the mixture from splitting.
- Sift the remaining flour and baking powder into the bowl and fold through gently using a large metal spoon. Stir in the cooled coffee liquid and chopped walnuts until evenly distributed.
- Divide the batter evenly between the two prepared tins and level each surface with a palette knife.
- Bake for 22 to 25 minutes until golden, slightly pulled from the edges, and a skewer inserted in the centre comes out clean.
- Leave the sponges in their tins for 5 minutes, then turn out onto a wire rack and cool completely before assembling.
- Beat the softened butter until smooth, then gradually add the sifted icing sugar in three or four additions. Stir in the cooled dissolved coffee and beat until silky and spreadable. Add a splash of milk only if needed.
- Place one sponge on a serving plate and spread half the buttercream over the top. Set the second sponge on top, spread the remaining buttercream evenly, arrange walnut halves around the edge, and leave to settle for 15 minutes before slicing.
Notes
- Cream the butter and sugar for a full 3 to 4 minutes to build a light, open crumb in the sponge.
- Always allow the dissolved coffee to cool completely before adding it to the batter or buttercream.
- Add a tablespoon of flour with each egg to keep the mixture stable and prevent curdling.
- Do not overmix after folding in the flour as this tightens the crumb and results in a denser sponge.
- Allow the sponges to cool fully before applying buttercream, as warmth causes it to slide and melt.
- Use butter that is softened but still cool to the touch for a smooth, non-greasy buttercream.
- Dip a palette knife briefly in hot water and dry it before each pass for a clean, even buttercream finish.